Use Hexo Build Bolg in Github and Connect to your website
Recommend read the whole article throught before taking actions
What do you need?
Required
- An account in Github
- Git in your computer
- Node.js
Optional
- Your own personalized domain, like: LycheeX.com
- An account in Cloudflare for certification (https looks really cool!)
- Travis-ci for continuious integration
Step by Step Guidance
Follow the step in Hexo Doc to install Git, Node.js and Hexo
The doc gives a short and clear introduction in Hexo as well as detailed guidance of installation of Node.js and Git Tool.
Special for Mac User:
Installing Node.js® and NPM is pretty straightforward using Homebrew. Homebrew handles downloading, unpacking and installing Node and NPM on your system. The whole process (after you have Homebrew installed) should only take you a few minutes.
Installation Steps:
Open the Terminal app and type
1 | |
Test:
1 | |
Genernate Hexo Blog
1 | |
More command information, you can refet to Hexo Command Doc
Choose a theme
Lots of developers donated their theme to Hexo, which can save us plenty of time for designing and developing. It’s nice and easy to use. Of course, you can develop your own theme if you want to. I am not sure about the detailed information, but it can be found in the website.
As for me, I chose the theme Cactus Light. Normally, the theme repository on github provides you the steps of add them to your hexo project.
Genernally, following things:
- In the root directory of your project:
$ git clone <theme-git-location> themes/<theme-name>
Change the theme property in the _config.yml file under your project
1
2
# theme: landscape
theme: cactus-lightEnter ‘theme/
‘ folder and change _config.yml file to configure your information to the template Run:
$ hexo generateand$ hexo server
Create a new article
hexo new [layout] <title>
This command is used to create a new article. If no layout is provided, Hexo will use the default_layout from _config.yml. If the title contains spaces, surround it with quotation marks.
Then a new .md file will be created in ‘
Use any tool you like to edit it. After that, use the following steps:
1 | |
Now, you are able to see your new blog in http://localhost:4000.
Put it online using Github
You need to have a github account. Registering one is as easy as creating an account in Weibo.
Then, you need to create a repository using the name ‘
Now, let’s get back to your local environment from the web world.
Edit ‘_config.yml’ file in the root directory of your project.
Change the deploy node like this:
1 | |
Now, it’s time to deploy to the website.
Hold on, type following code when you are ready.
1 | |
Then, open the http://
Connect to your own domain.
Go to the setting page in the respository. Github Setting
Enter your domain in the input and click save.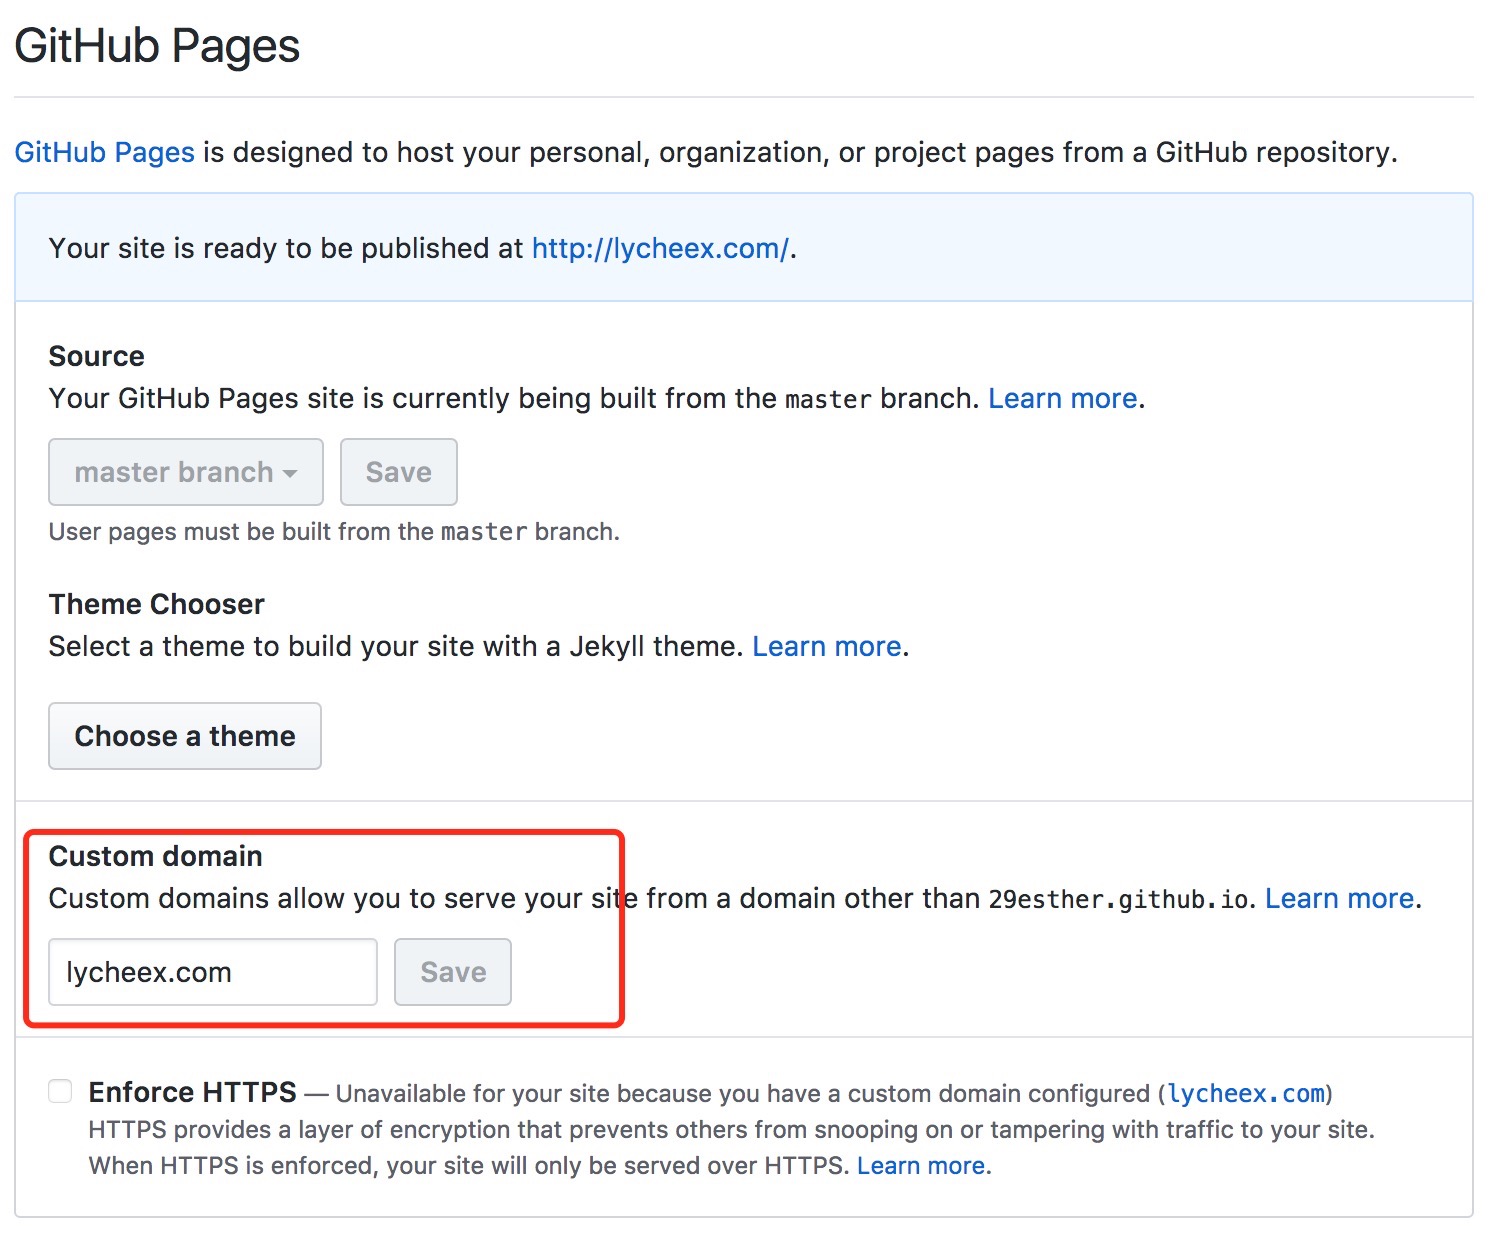 Add a Domain
After that, you can visit your website and see the blog.
Connect to github
Now all the work is done. You can visit your website from anywhere, add a new article or editing an existing one.
However, now you can only edit it in your computer. If you want to put the sources online and edit it anywhere, github is a good help.
Create another repository in Github, give it any name you like. Here, I will use ‘you-like’ as an Example.
In the root directory of your project, type:
1 | |
If you meet some authentication problems during the process, you can check that if you have connected your coputer to Github. Follow the steps in Connecting to GitHub with SSH to solve the problems.
Now you have pushed your original resource to the website. Which means you no longer need to worry about the loss of your project. Every time you change something, just commit them to the Github.
Check the project in github, the folder of the theme that you added may be empty. It is skipped by git because it contains another git log. So the easiest solution is to delete the .git folder and then commit again.
Using Travis-ci to deploy the project on commit
CI is short for Continuous Integration. Travis-ci is one of the most popular website for CI. You could login with your github account and then it will get all your reporsitory.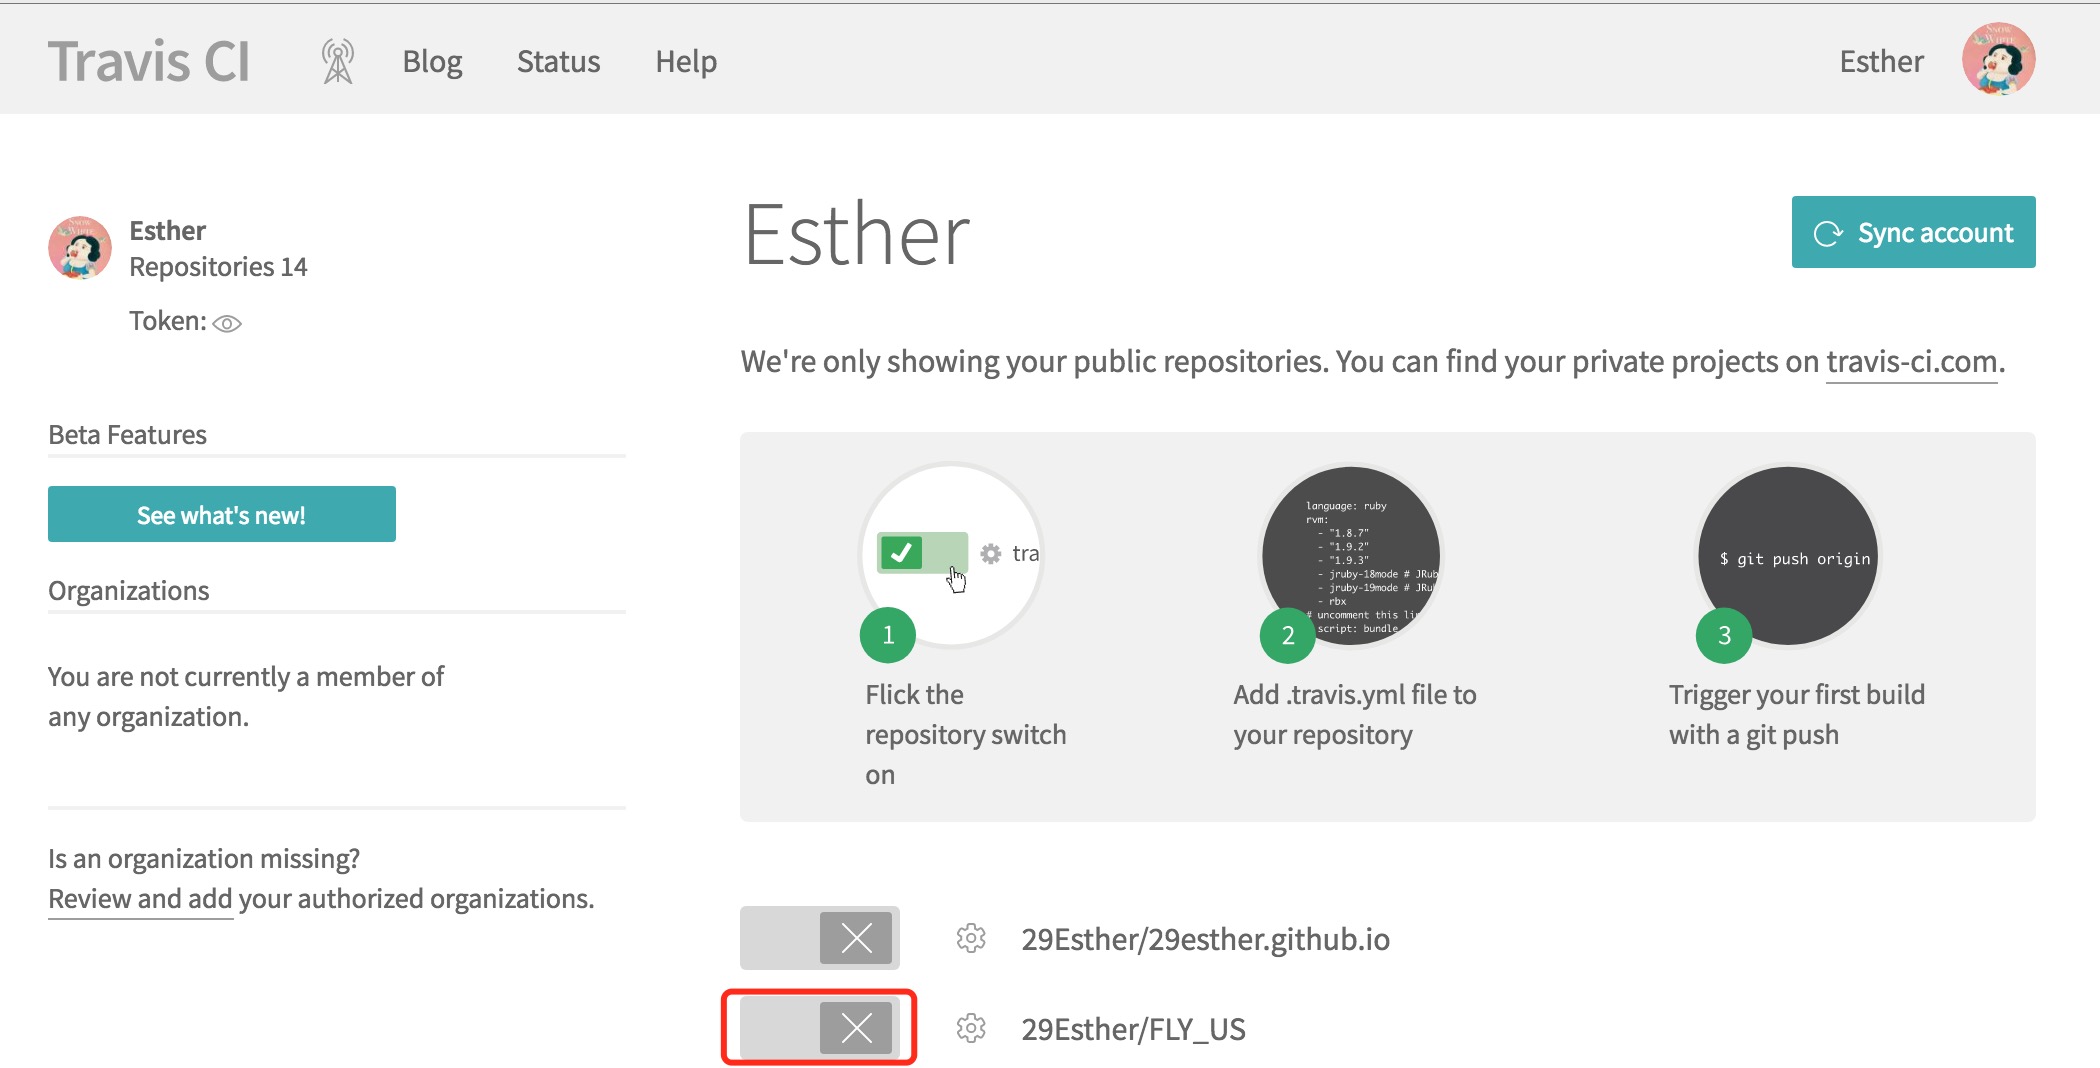 travis-ci
Switch on the repository of your project and enter the setting of the repository in travis-ci.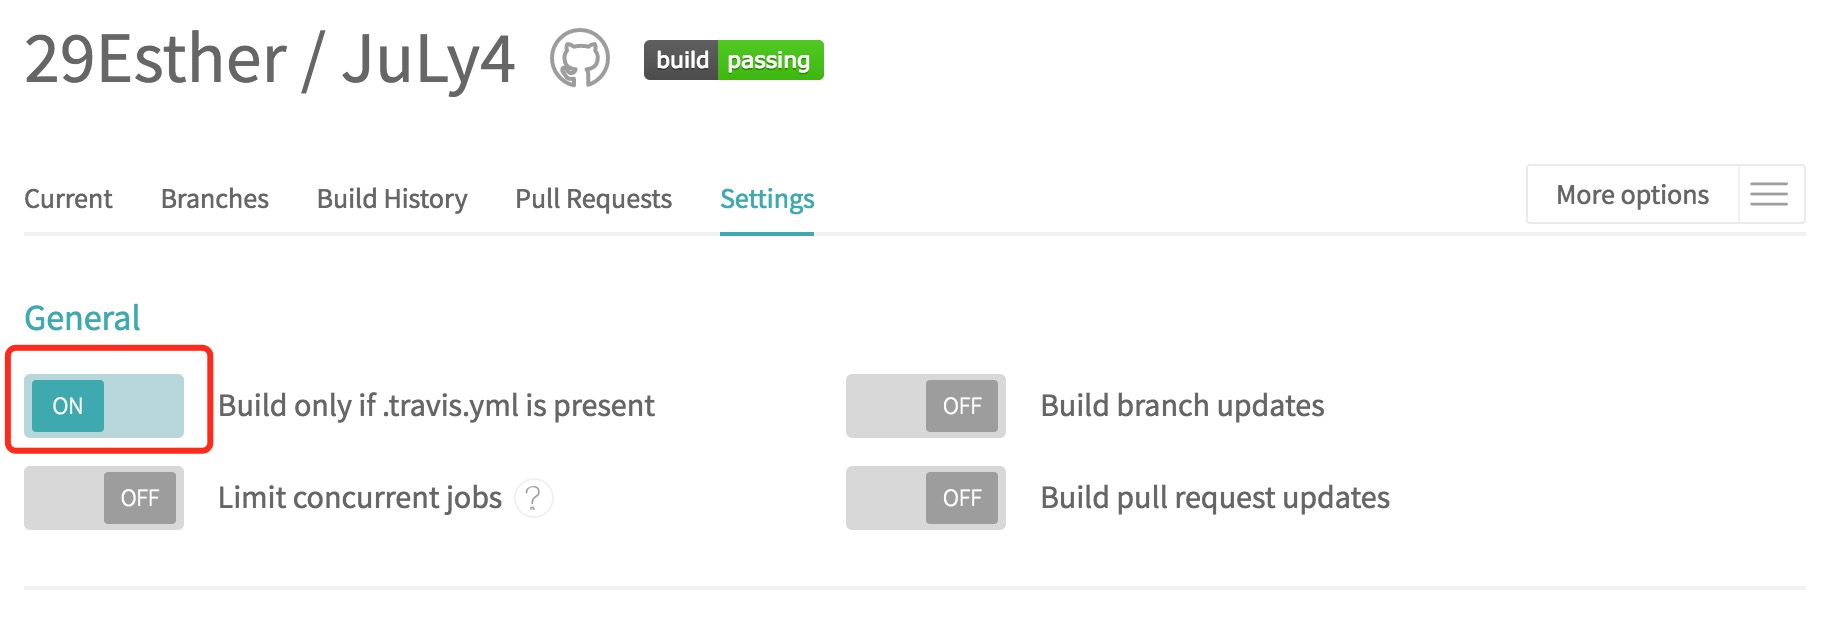 travid-ci-setting
Switch on the ‘Build only if .travis.yml is present’.
Now, let’s get back to the repositroy in your computer.
Add a new file ‘.travis.yml’ in the root direction. This is for configuration of travis-ci.
1 | |
Reference: